Roller Coaster Birthday Card
.ashx?la=en)
Merriment Design
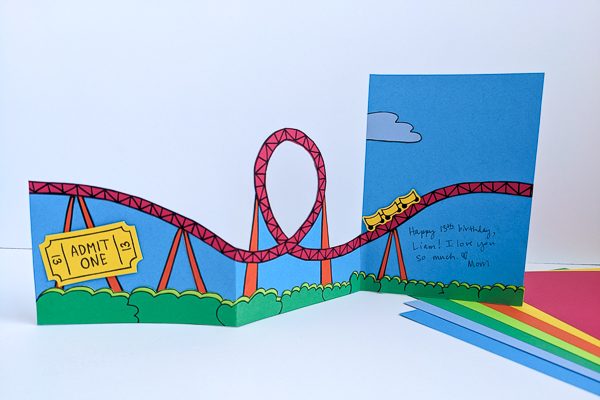
Make my thrilling roller coaster birthday card for your favorite theme park fan!
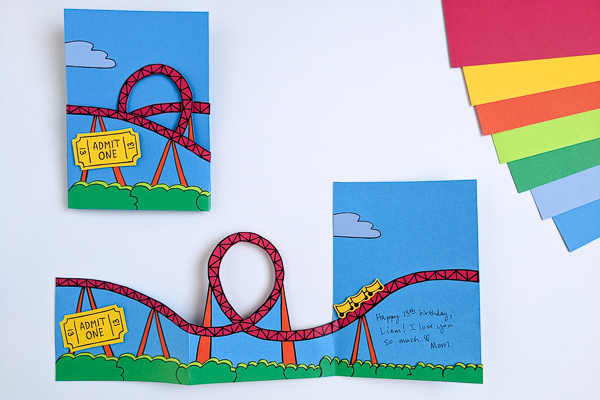
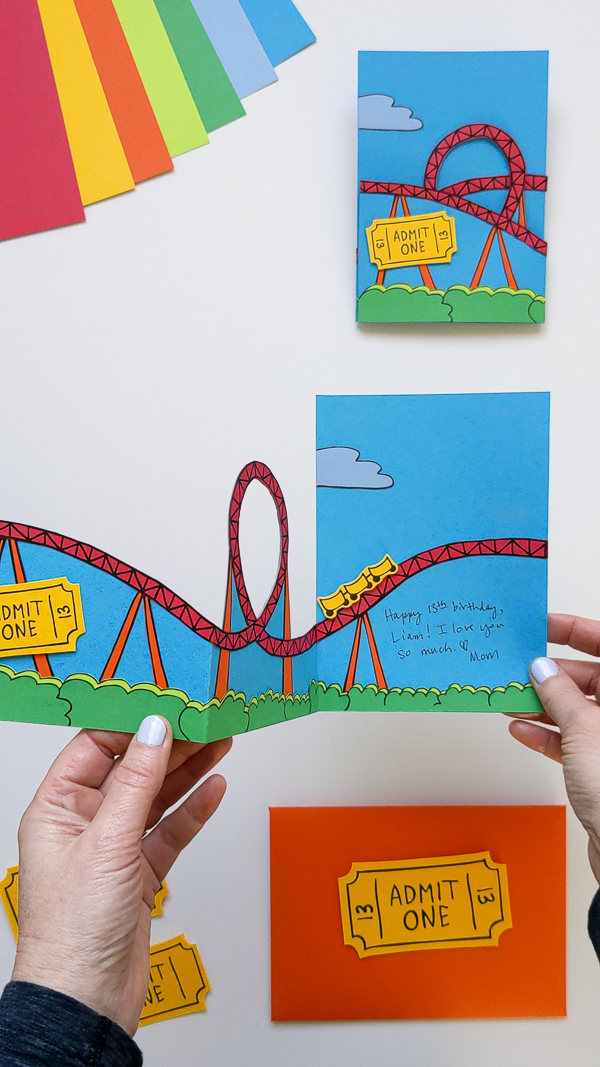
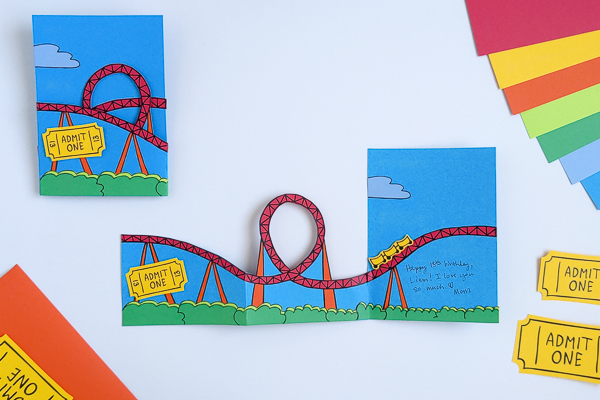
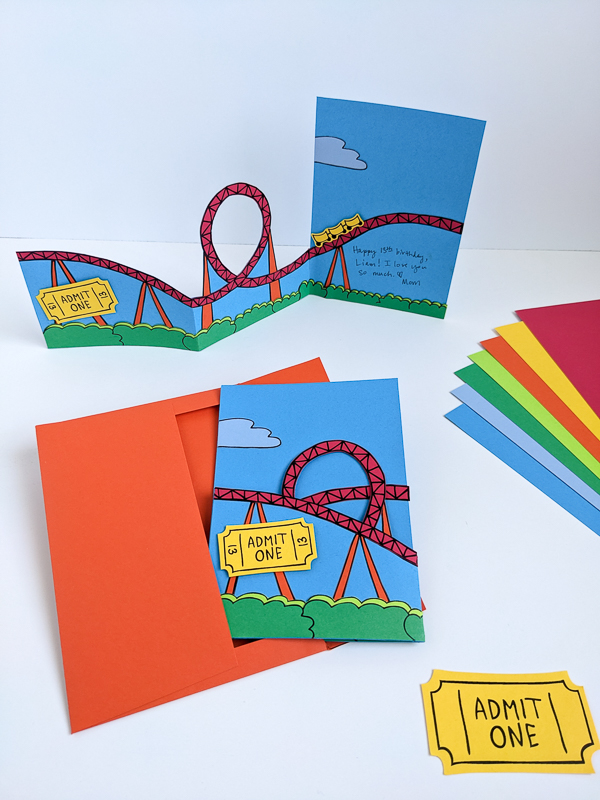
My clever tri-fold card features a surprise reveal: when folded, you’ll only see part of the roller coaster track and loop. But as soon as you unfold it, the full track, loop, and cars appear, along with a special handwritten birthday message from you!
Astrobrights® asked me to design an original paper craft for National Craft Month using their Astrodesigns® Starter Cardstock pack. This pack contains a vibrant bunch of colors to customize your card. Just print my card templates onto your favorite colors, then fold, cut and assemble the pieces. I chose red for my track, orange for the supports, green for the bushes and a blue for the sky.
Be sure to add the recipient’s birthday age to the “Admit One” ticket—it’s a fun way to send them racing into another year of adventure!
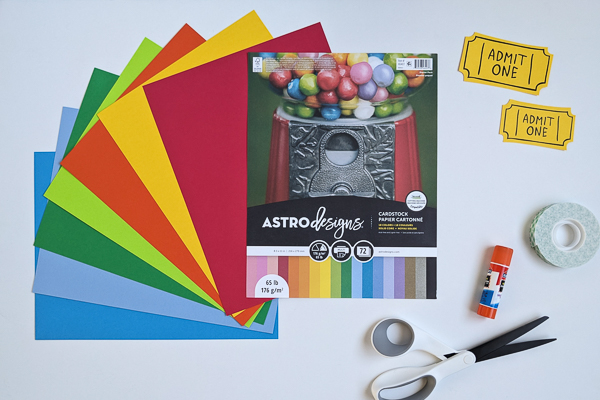
Supplies:
- Kathy Beymer’s printable Roller Coaster Card template (PDF)
- Astrodesigns® Starter Cardstock pack
- Scissors
- Paper glue or glue stick
- Foam mounting tape (optional)
- Craft knife and self-healing mat (optional)
- Washi tape to seal the envelope
- Black pen
How to make my Roller Coaster Card:
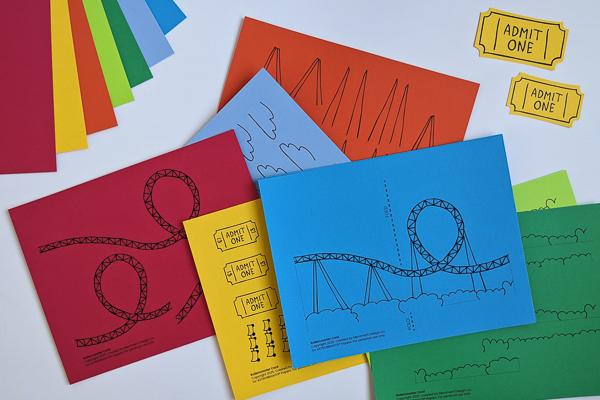
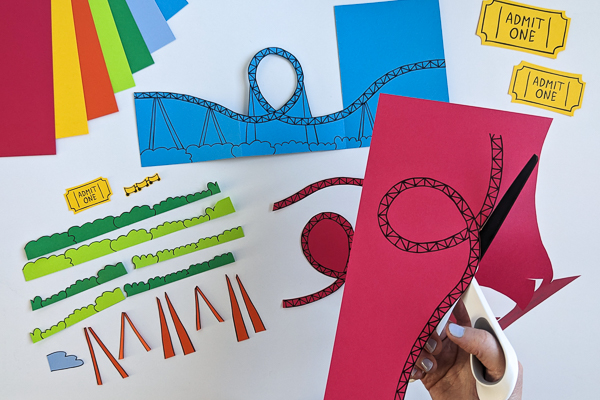
Step 1: Print my two card templates onto blue Astrodesigns® cardstock. Then print the pieces -- track, cars, Admit One ticket, supports, and bushes -- onto your favorite colors. I chose red for the track, yellow for the cars and Admit One ticket, orange for the supports, and green and bright green for the bushes.
Step 2: Fold the front and back of the card along the fold lines. I recommend using a bone folder or butter knife and ruler or straight edge to crease the paper before folding, but you can also just fold it freehand.
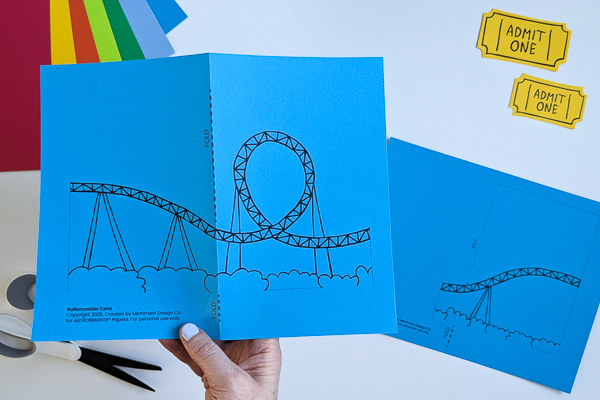
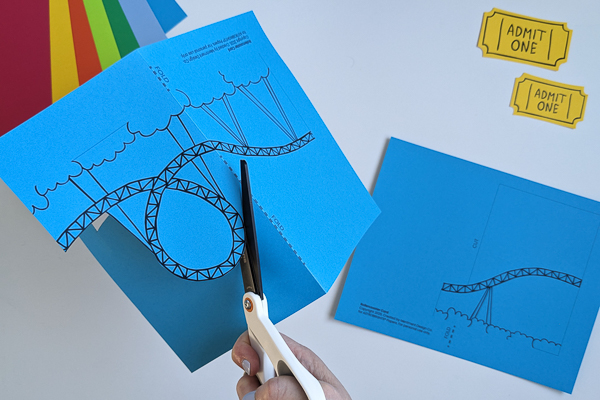
Step 3: Cut out the two blue card pieces as pictured. I used a craft knife with a self-healing mat to cut out the inside of the loop.
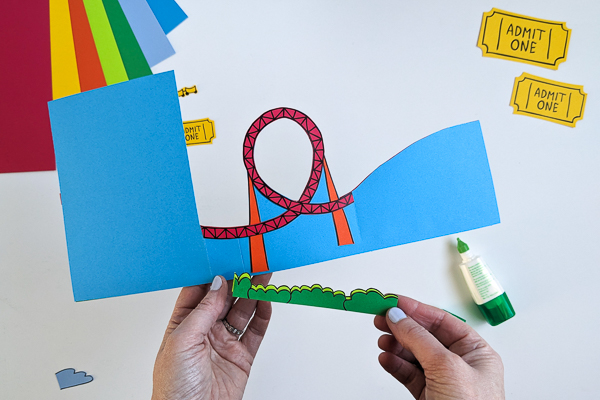
Step 4: Glue the front and back of the blue card together to create one long roller coaster. Let dry completely. Now the base of your card is ready for more color!

Step 5: Cut out the roller coaster pieces. Note: Be sure to leave a yellow border around the Admit One ticket and cars like I did.
Step 6: Glue the supports to the card, then the track, then the bushes. Let dry completely.
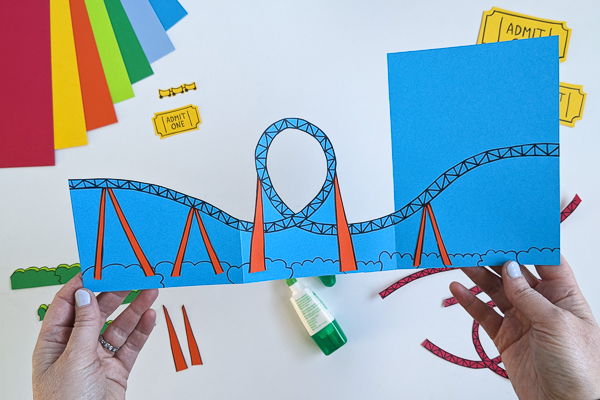
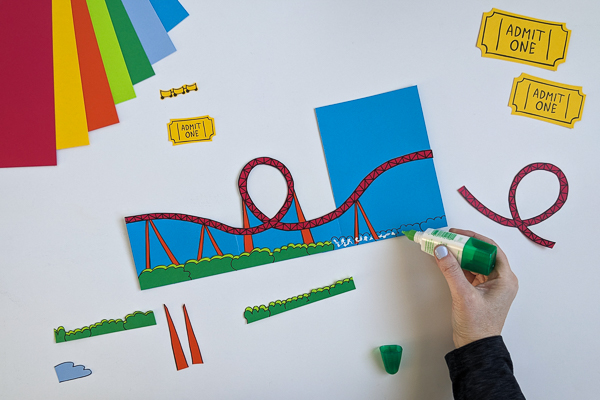
Step 7: Flip the card over. In the center panel, glue the supports first, then track, then bushes. Let dry completely.
Step 8 (optional): Write the recipient’s birthday age onto the Admit One ticket using a black pen
Step 9: Cut a piece of foam mounting tape (or use paper glue) to attach the Admit One ticket to the card front.
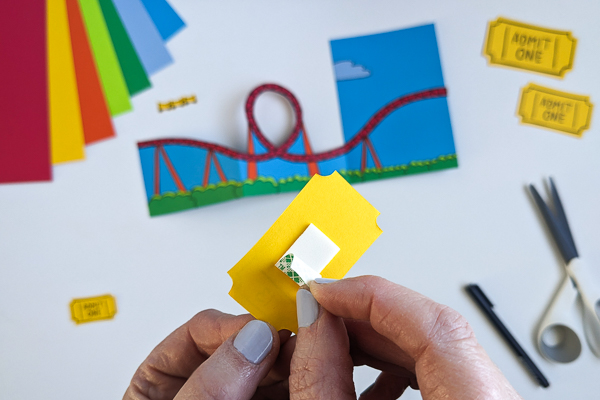
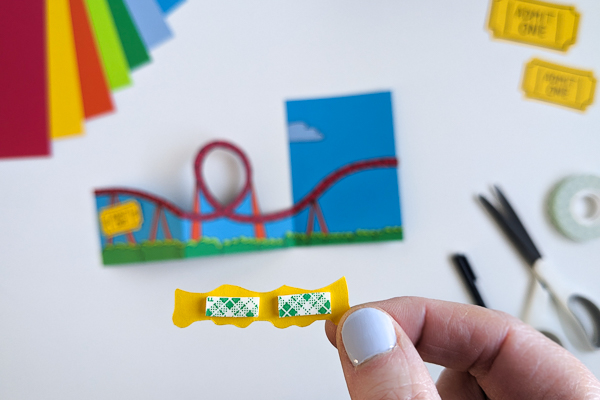
Step 10: Position the cars so they’re hidden when the card is closed by cutting a piece of foam mounting tape (or use paper glue) to attach the cars to the track.
Step 11: Print the envelope template making sure to print full size (avoid printer settings such as “scale to fit”); lines may get cut off when printing at full size and that’s OK. Cut and fold along the lines and glue the side flaps. Let dry completely.
Now you can write a fun birthday message on the card under the track so that your birthday wishes appear when your recipient opens their card. It’s a birthday wish that delivers all the fun—no height requirement needed!
Be sure to see my other original paper crafts for Astrobrights including my Dino-mite Party Ideas, Graduation Tassels Money Holder, S’mores Paper Campfire Playset, 3D Seashells, Camping Tents Playset, and many more.
Kathy Beymer
Instagram: @kathybeymer
Pinterest: @merrimentdesign