Itsy Bitsy Spider Mums

Made By Ilyssa
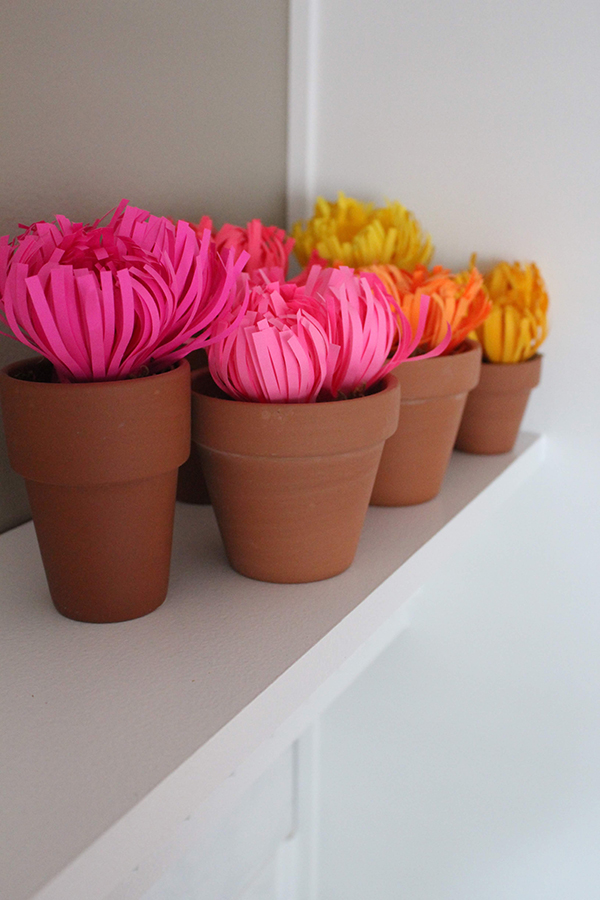
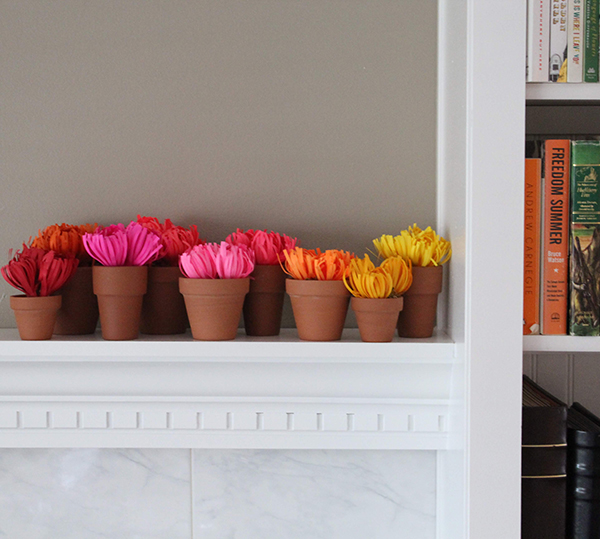
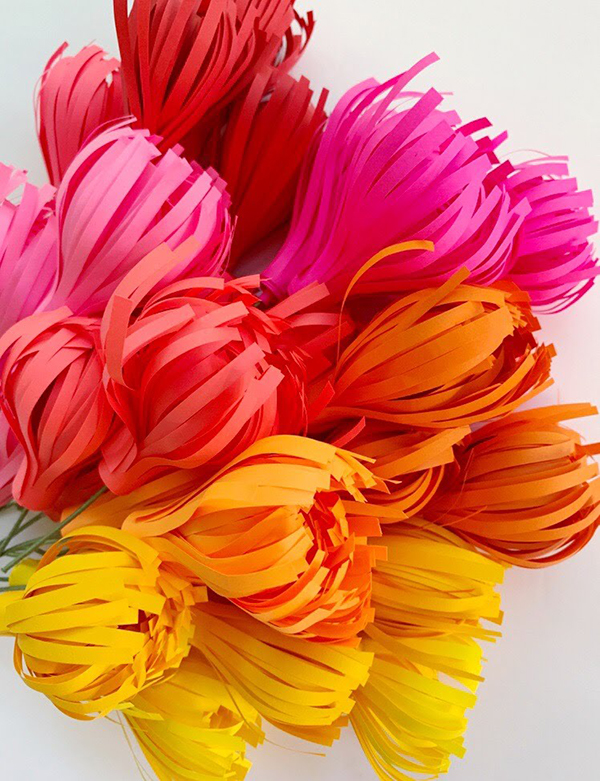
Every fall I look forward to the changes in my city - of course I love watching the leaves change from a crisp green to shades of orange, red, and yellow, but I especially love the shift of seasons in our neighborhood farmer’s market. Sweet berries are replaced with cartons of apples, grapes, and my favorite - freshly picked flowers. I especially love when the mums make their first appearance of the season. But by the end of the summer, I don’t have much gardening energy left, and I rarely buy the mums I love to look at so much.
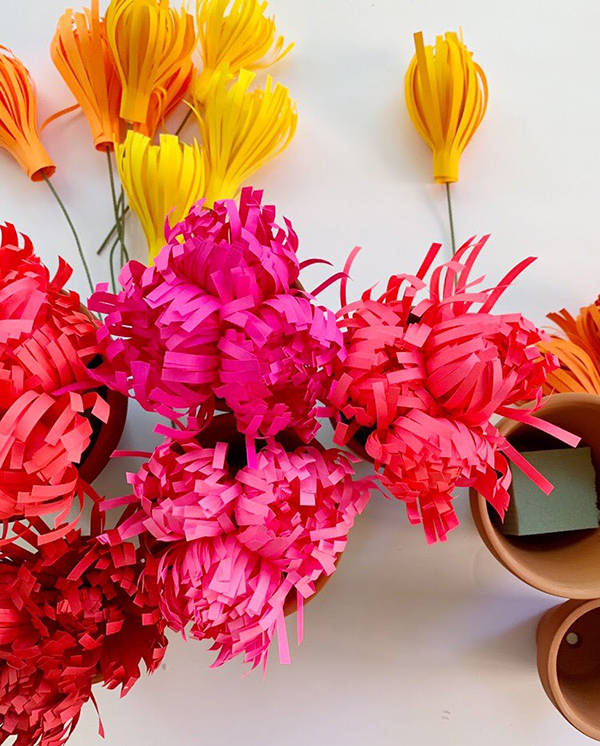
This got me thinking - how I could bring those warm fall colors inside my house? Using ASTROBRIGHTS paper, I created a simple flower inspired by the autumnal spider mum. With its wispy thin petals, it fills up a planter nicely and doesn’t take too long to make, with the help of multi-blade herb scissors. Grab your favorite colors of ASTROBRIGHTS and your planters will be full of flowers in no time. The best part? No watering necessary!
Supplies:
- ●ASTROBRIGHTS papers in nine colors - I used: Cosmic Orange™, Orbit Orange™, Rocket Red™, Re-Entry Red™, Plasma Pink™, Pulsar Pink™, Fireball Fuchsia™, Solar Yellow™, and Galaxy Gold™
- ●Herb scissors
- ●Regular scissors
- ●Wire cutters
- ●Floral wire
- ●Double sided tape
- ●Terra cotta pots
- ●Floral foam

Step 1: Choose your colors and gather your supplies.
For this project I wanted a warmer, autumnal feel so I chose a palette full of reds, pinks, oranges and yellows.
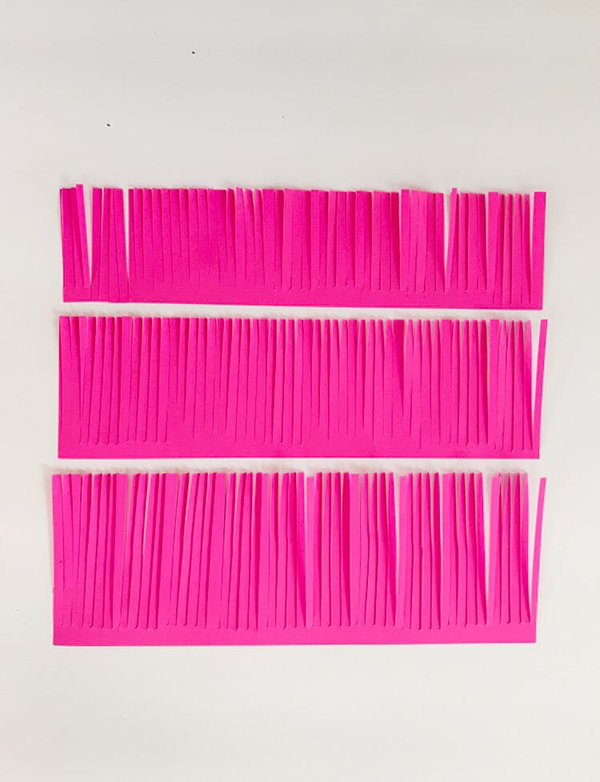
Step 2: Measure and cut your papers.
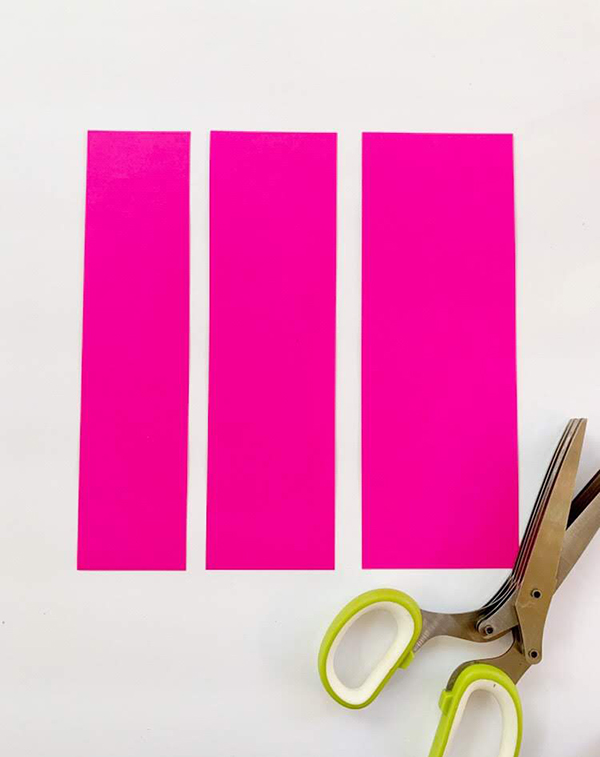
Using a paper cutter or scissors, cut the paper into three different widths. I chose 2”, 2.5” and 3” for my petals, but if you want bigger flowers, you can increase the width. All strips are 8.5” long. Each flower takes two or three layers. For bigger flowers I used all three widths, and for smaller flowers I used 2” and 2.5” strips. (This is all very flexible and can be changed depending on how big or small you want your flowers to be)
Step 3: Cut the strips into fringe.
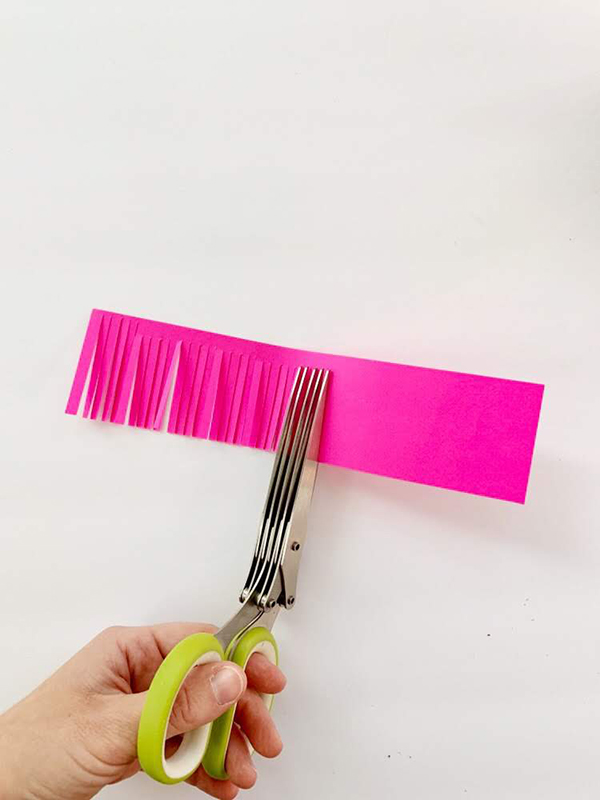
Using herb scissors (these save a lot of time!), cut fringe for all three strips. Cut as close to the bottom as possible, without cutting off the fringe.
Step 4: Curl the fringe.
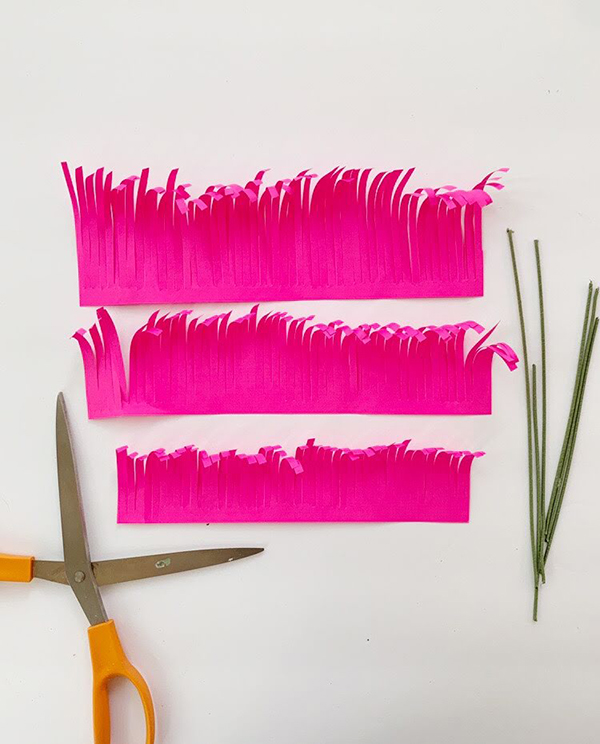
I found the easiest way to curl the edges of the fringe was by using an open scissors as if I was curling ribbon. It works like a charm!
Step 5: Attach the petals.
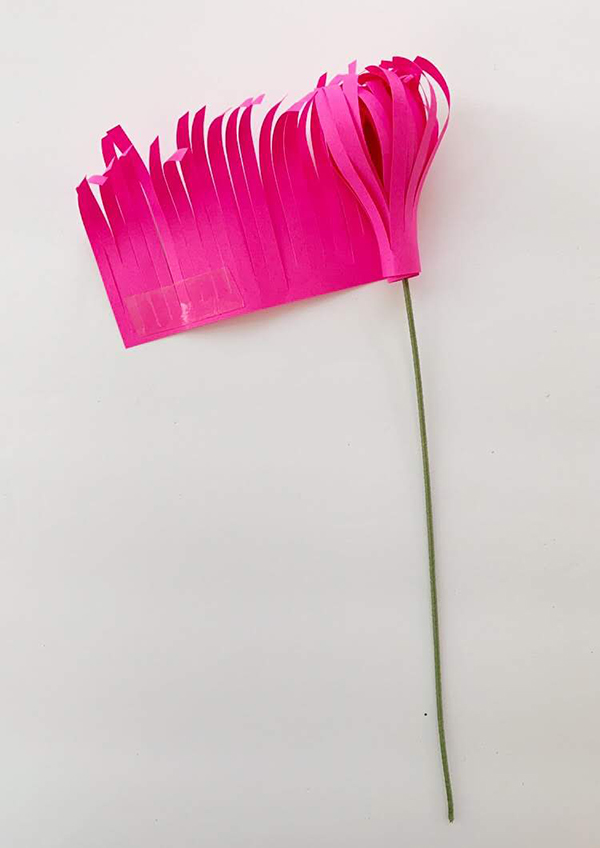
Place an inch long piece of double sided tape on the bottom corner of the narrowest strip (2”). Place the end of the floral wire on top of the tape and begin rolling the strip around the wire. Once you reach the end, secure it with another piece of tap. Important tip: the curls of the fringe should be facing inward.
Once the narrowest strip is attached, repeat with the other strips.
Step 6: Fluff and arrange!
Now for the fun part! Gently push down on the top of the flower to fluff out the petals. You can also find the center of the flower and bend back the petals a bit to make it look fuller. Place your floral foam inside your planter and have fun arranging your beautiful flowers!
Although I’m not looking forward to the bitter Chicago winter that is quickly approaching, at least I’ll have bright and warm colored flowers on my shelf to remind me of my favorite fall flowers.