DIY MOM Mother’s Day Wreath
.ashx?la=en)
Merriment Design
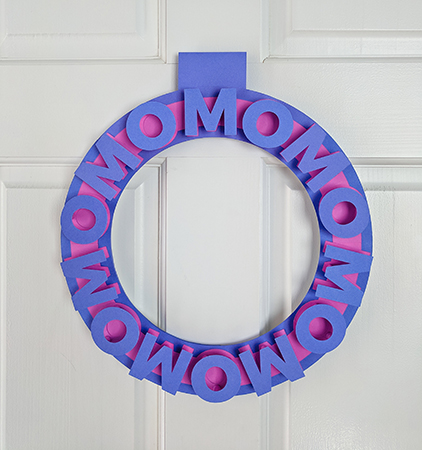
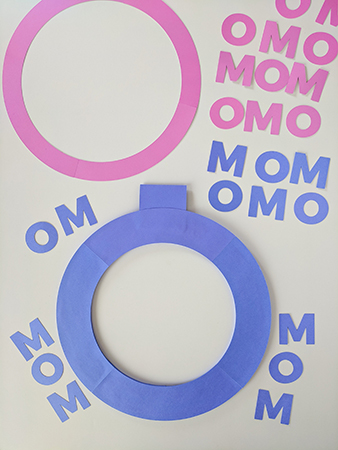
Happy Mother’s Day with this modern MOM DIY Mother’s Day wreath from ASTROBRIGHTS® Papers!
I’m proud to be helping ASTROBRIGHTS® Papers celebrate its 50th anniversary. It’s no secret that I’m a huge ASTROBRIGHTS fan and their colorful paper inspires me so much.
Astrobrights® Papers was the first neon paper ever created. In 1969, the year Buzz Aldrin walked on the moon, a fellow named Chuck Hodgdon invented paper in astronomically bright colors.
Today I’m sharing a paper project that you can make for Mother’s Day that your mom can display all year long! This DIY Mother’s Day is part art project, part greeting card, part gift, and it’s easy to make.
I really wanted to make the MOM letters pop out in 3D, so after playing around quite a bit I discovered that I could cut strips of scrap paper, roll them up with tape, and make my own paper risers for the letters. How fun! I think it’s an unexpected and cool effect that’s easy to make and makes this Mother’s Day wreath look really special.
Download my templates below to make your own DIY MOM Mother’s Day Wreath that shows your mom how much she is celebrated.
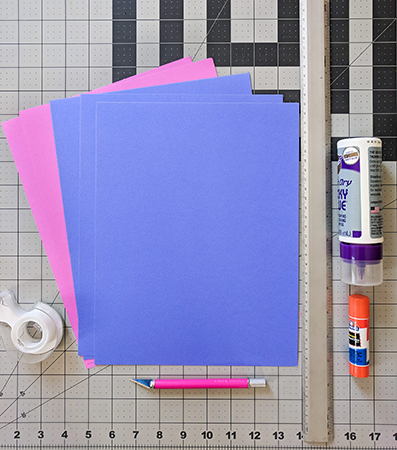
Supplies for making DIY MOM Wreath for Mother’s Day:
-
ASTROBRIGHTS® Papers in two colors (I used Venus Violet™ and Outrageous Orchid™)
-
Paper cutting machine (optional yet recommended) or paper scissors
-
Glue stick or other paper adhesive and tape
-
Foam core (optional)
-
Craft knife, metal ruler and self-healing mat
Step 1: Choose your colors and gather supplies.
I chose Venus Violet™ as my primary color with a dash of Outrageous Orchid™ as a pop color. You could choose your mom’s favorite colors or choose colors to coordinate with her home.
.ashx?la=en)
Step 2: Print and cut out pieces.
Print the templates onto from ASTROBRIGHTS® Papers. You’ll need 7 M-letters and 7 O-letters of each color. Print the large wreath shape onto your primary color and the thin wreath shape onto your complementary color.
Cut out pieces using your best pair of paper-cutting scissors. You’ll save some time if you use a paper cutting machine, so I’m also including SVG files below.
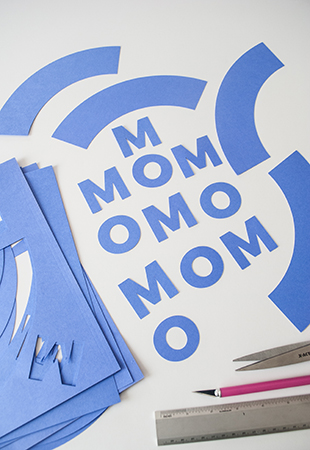
There are two templates to print and cut:
-
Primary color: 7-M letters, 7 O-letters, wreath shape (choose the PDF file for scissors or the SVG file for a cutting machine)
-
Complementary color: 7-M letters, 7 O-letters, wreath contrast (choose the PDF file for scissors or the SVG file for a cutting machine)
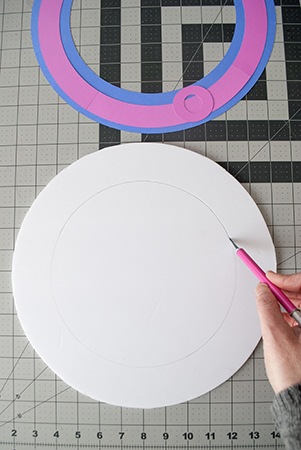
Step 3: Assemble DIY Mother’s Day wreath base.
Tape the primary colors wreath shape together by assembling the four wreath curves. Repeat the process for the wreath contrast color.
Trace the assembled wreath onto foam core board and cut out using a craft knife. This will give strength and stability to your paper wreath and makes it easier to hang.
Cut thin strips of scrap paper in your primary color and glue around the foam core wreath sides. This will hide all of the white on your wreath and makes for a more professional-looking finish.

Fold the wreath hanger in half and glue onto the foam core wreath, with ½ glued to the front and ½ glued to the back. Then glue the wreath shape onto the foam core. I like to put a little bit of school glue onto the foam core and spread it thin with my fingers to avoid bumpiness. You could alternatively use a glue stick.
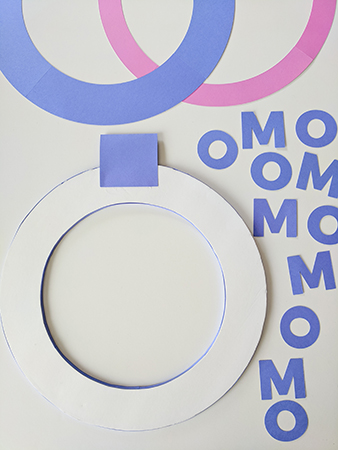
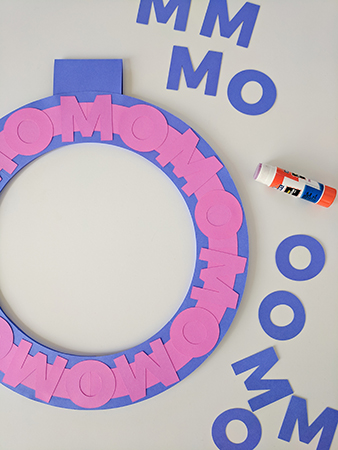
Now you’re ready to start decorating your DIY Mother’s Day Wreath.
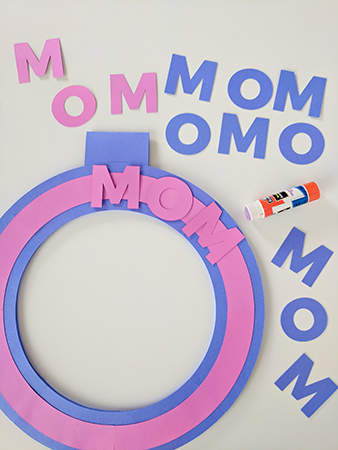
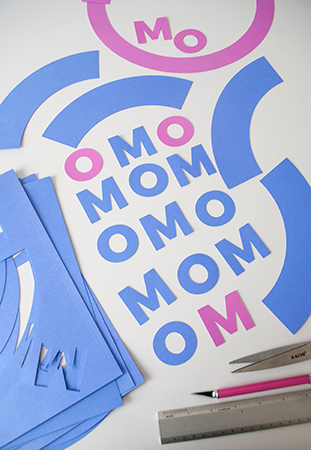
Step 4: Add contrast colors to your wreath.
Glue the contrasting wreath color onto the wreath, making sure that it’s centered.
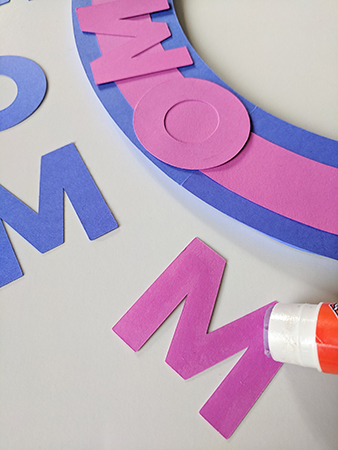
Add M-letters and O-letters around the wreath, starting with an M at the 12 o’clock position and an O at the 6 o’clock position.
Fiddle around with the letters until they are evenly spaced to spell MOM over and over again around the wreath. Then glue the contrast color letters to the wreath.
Currently, your wreath will show more of the contrasting color and honestly, you could stop here and it would still be cute. But let’s keep going to add some dimension.
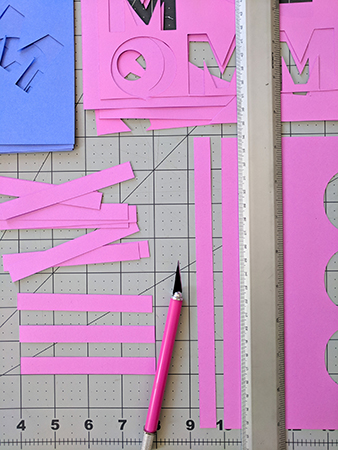
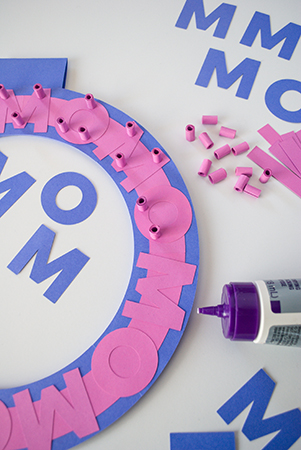
Step 5: Make and affix three-dimensional paper risers to the DIY Mother’s Day wreath.
Now this is the cool part. We’re going to add a little dimension using rolled scrap paper. Cut 42 strips of paper in your contrast color that measure ½” wide and 4” long.
Roll up the strips. I rolled mine around a quilting tool but you could just use a wooden skewer or a chopstick. Secure the strips with a piece of tape. You can also add a bit of glue if you’d like it to be extra strong.
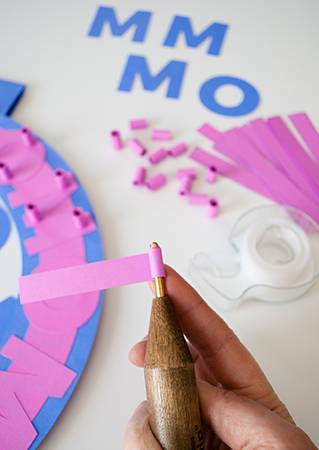
Glue three rolled paper risers onto each letter and let dry. These are going to help you make that cool 3D look.
Step 6: Glue M-letters and O-letters onto the rolled paper risers.
Glue the M-letters and O-letters onto the rolled paper risers and let dry.
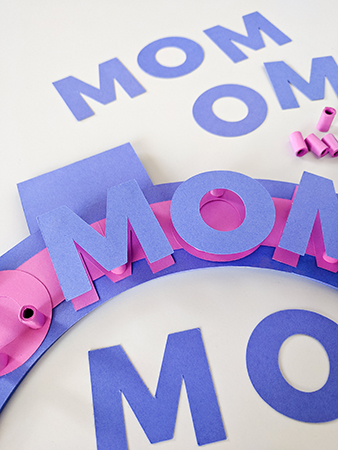
This will give you an unexpected and subtle 3D effect.
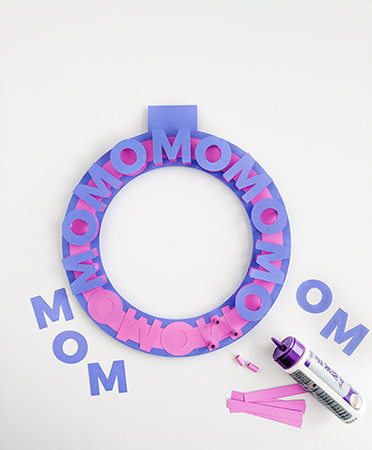
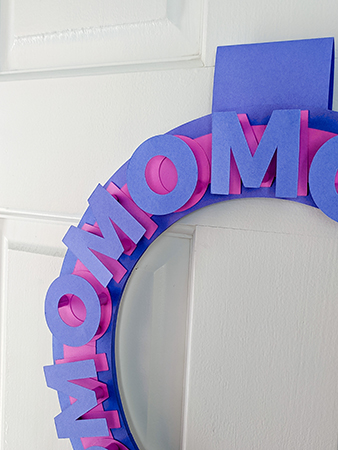
Step 7: Hang wreath.
Hang your wreath onto your mom’s wall or door for modern decor that shows every day how much she is celebrated.
I hope you like this heartfelt DIY Mother’s Day wreath that your mom can display all year long. Thanks, Mom, for all that you do!
Show us how you’re celebrating Astrobrights 50th! Create any project, post on Instagram and use #50YearsBright and tag @astrobrights for a chance to win a $500 American Express Gift Card. For more information view the official rules here.