DIY 3D Paper Snowflakes


Craft Box Girls
Winter is almost here and what better way to celebrate than with a do it yourself paper snowflake craft. These are fun for the whole family and can work well for any occasion.
Enjoy the video overview and the step by step tutorial and the material list below.
Material List
- Color Paper or Colored Cardstock
- Scissor
- Your Favorite Adhesive
- Yarn
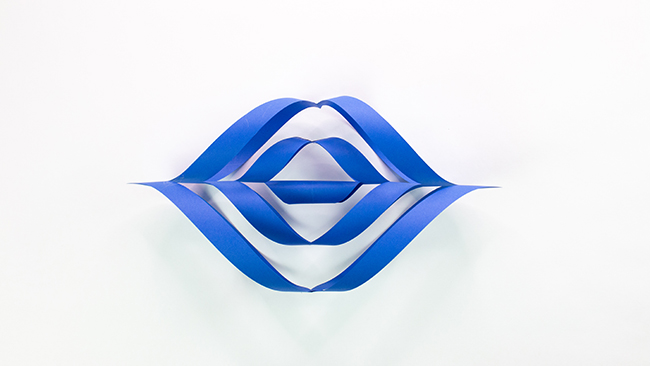
Snowflake One:
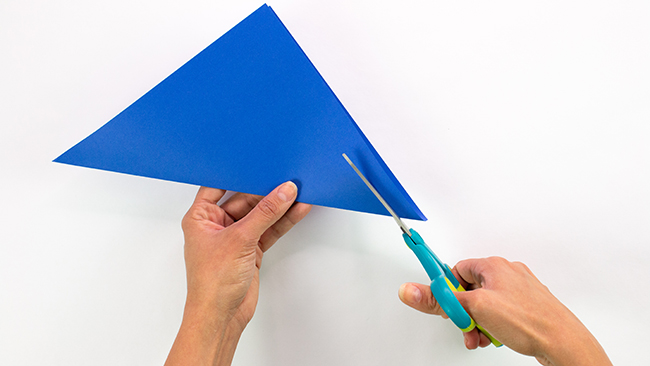
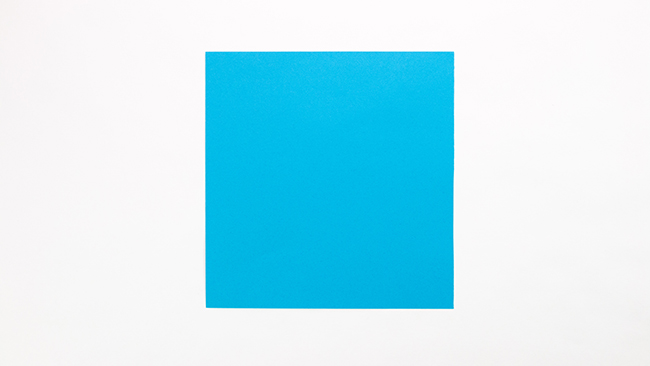
1. Cut a square from the 8.5 x 11 inch sheet of paper.

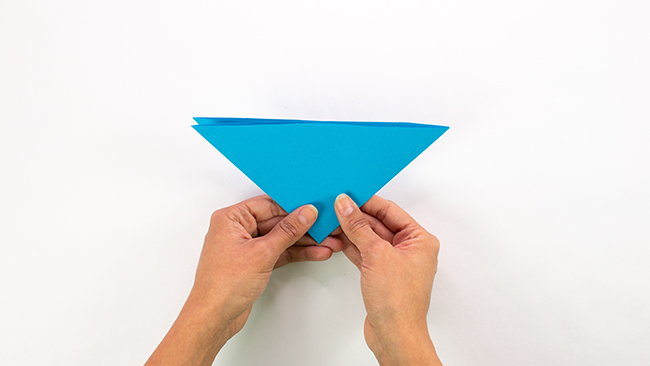
2. Fold point to point to form a triangle.
3. Starting at the folded edge cut straight lines toward the point stopping about 1 inch from the point.
4. Continue cutting upward stopping a few centimeters more each time until you get to the center.
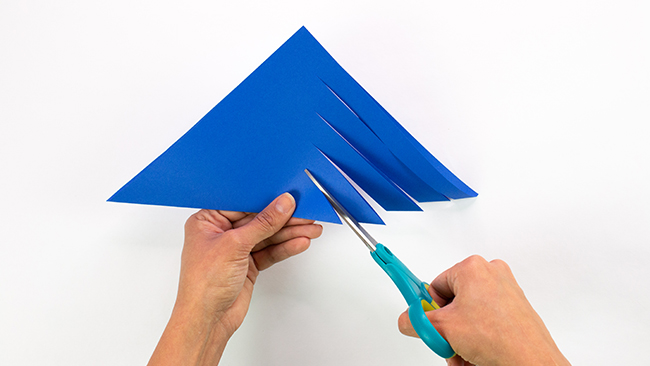
5. Repeat on the other side.

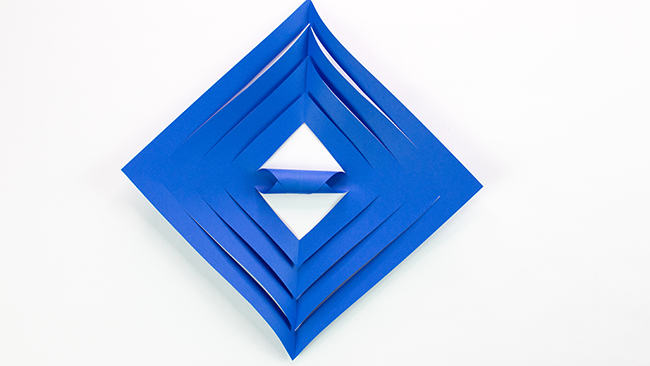
6. Unfold the triangle and lay the square flat.

7. Curl in the center cut and glue the edges together form a roll.
8. Flip over and curl the next layer of cuts inward to meet and glue to the edges.
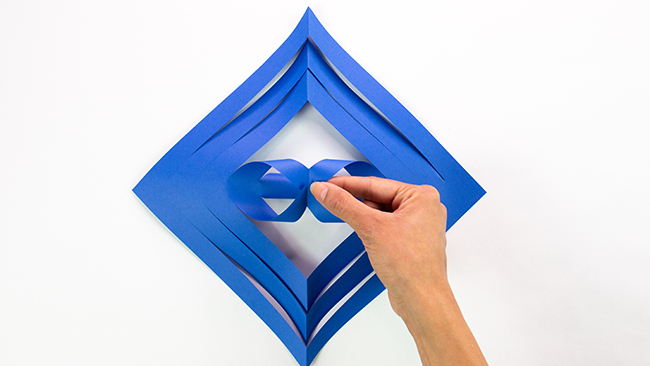
9. Flip and continue to do this until all the layers are glued.
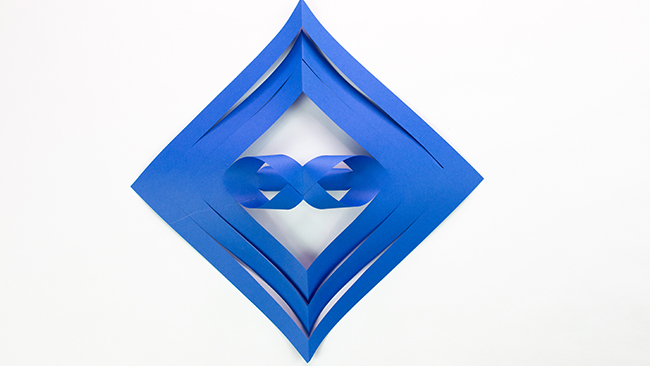
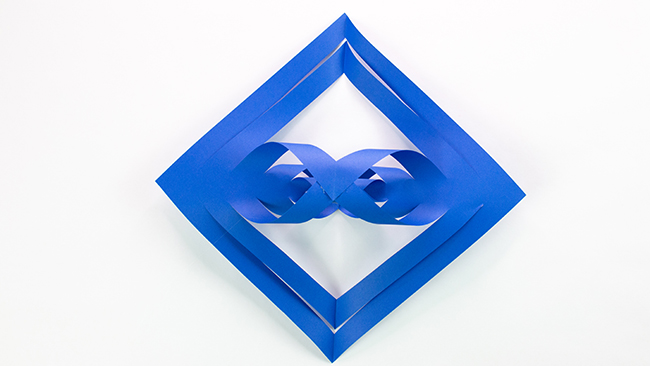
10. Glue a piece of yarn to the edge to make it easy to hang.

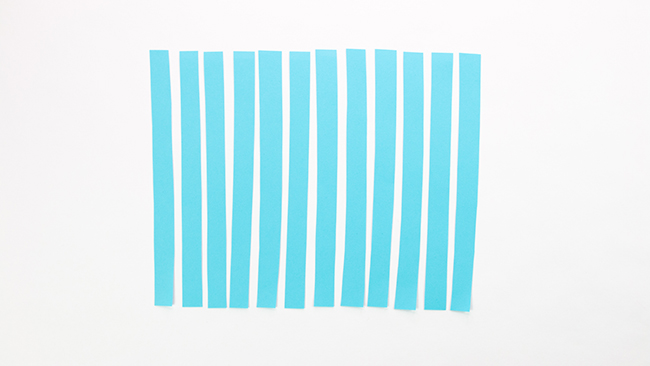
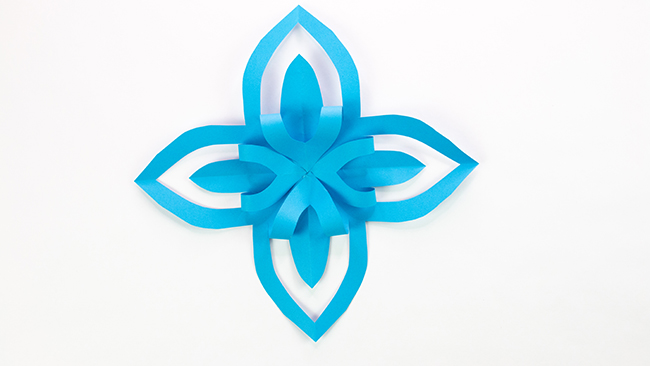
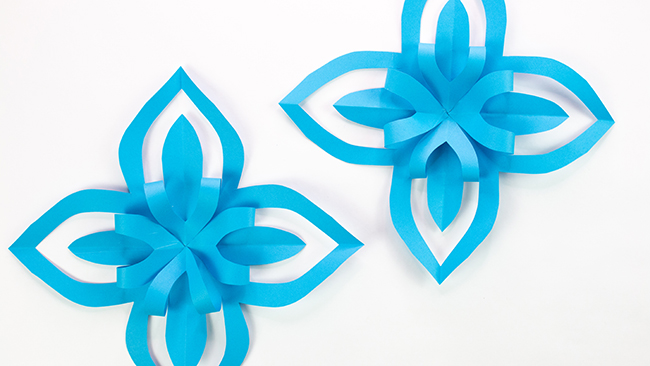
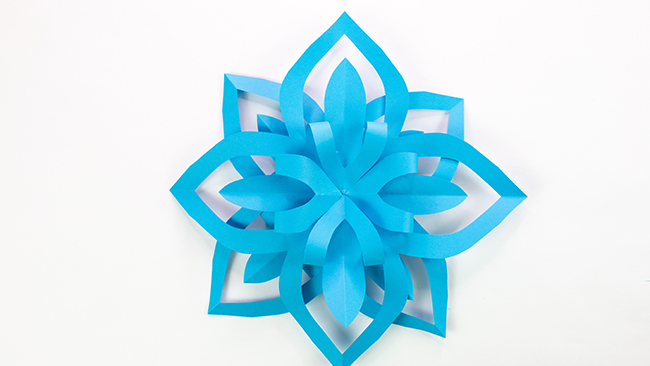
Snowflake Two:
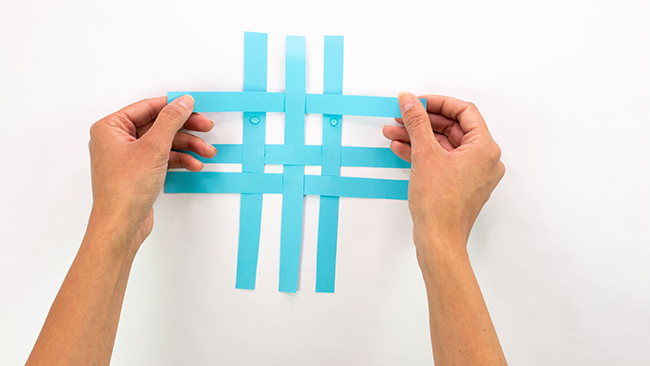
1. Cut a sheet of paper into .95 inch strips for a total of 12 pieces.
2. Take six of the strips and lay 3 horizontally and 3 vertically. Intertwine them using a basket weave pattern. Add glue to the intersecting points to secure.
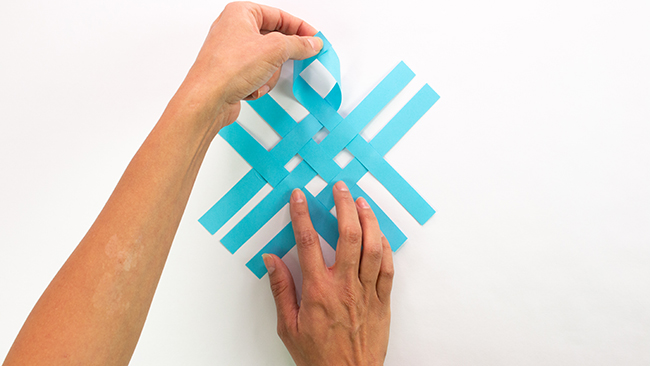
3. Glue the points together on all four sides.
4. Set aside and repeat steps 2 and 3 for the remaining pieces of paper.
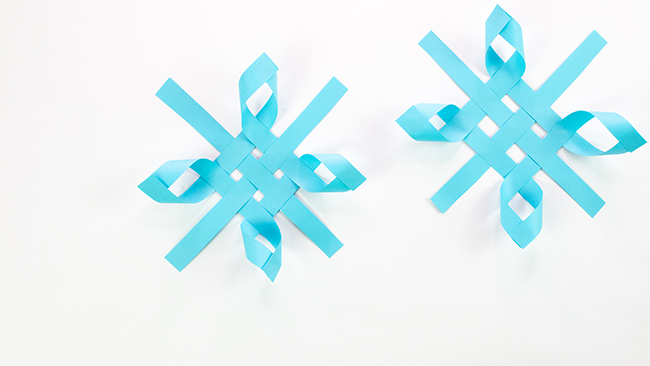
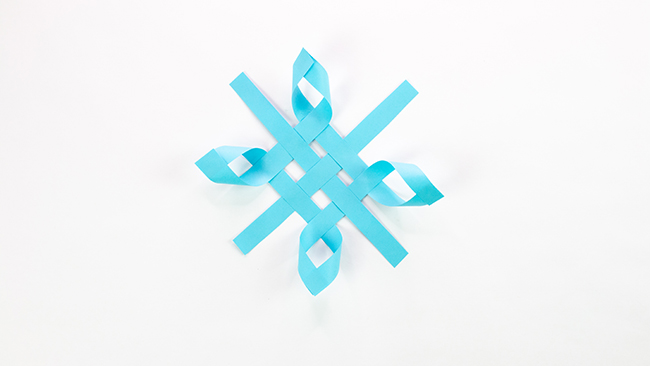
5. Glue both layers together and finish by curling and gluing the remaining straight ends.
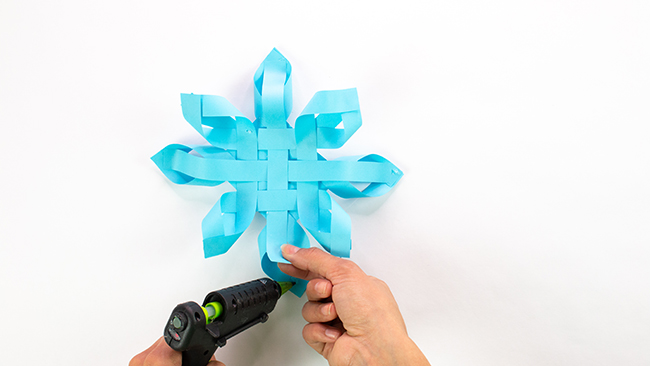

6. Glue a piece of yarn to the edge to make it easy to hang.
.ashx?la=en)
Snowflake Three:
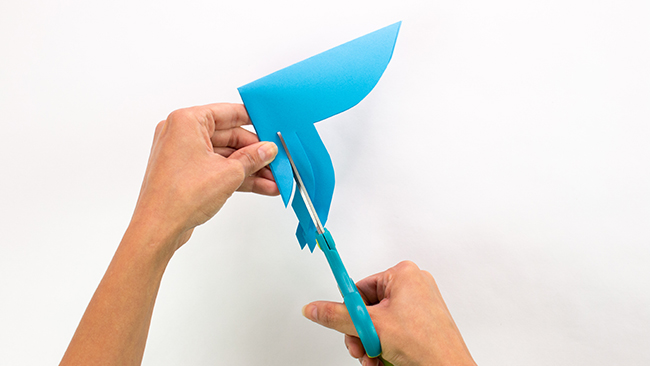
1. Cut a square from the 8.5 x 11 inch sheet of paper.
2. Fold corner to corner to form a triangle.
3. Fold corner to corner again to form a triangle.
4. Cut a curved point out of the folded side of the triangle.
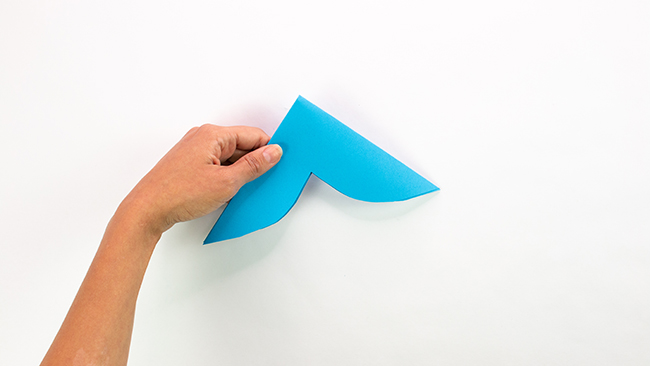
5. Starting about 3/4 inch above the curved triangle cut lines on each side but do not cut all the way to the center.
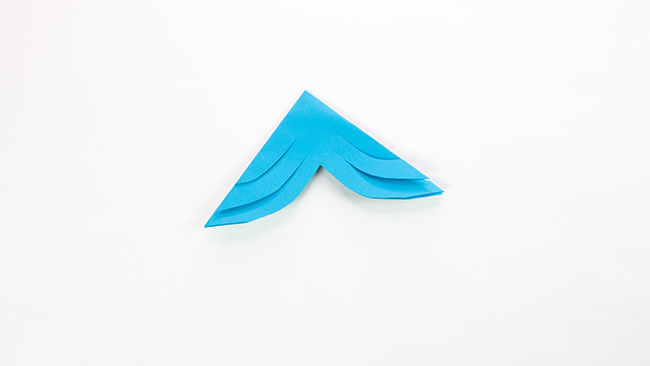
6. Unfold and lay flat.
7. Fold each middle point in toward the center and glue the point.
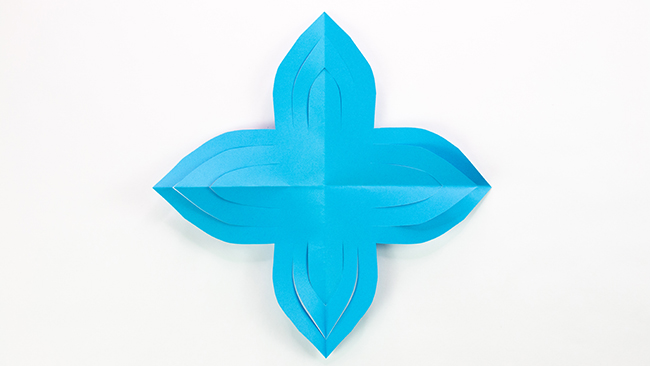
8. Complete steps 1-7 with a second sheet of paper.
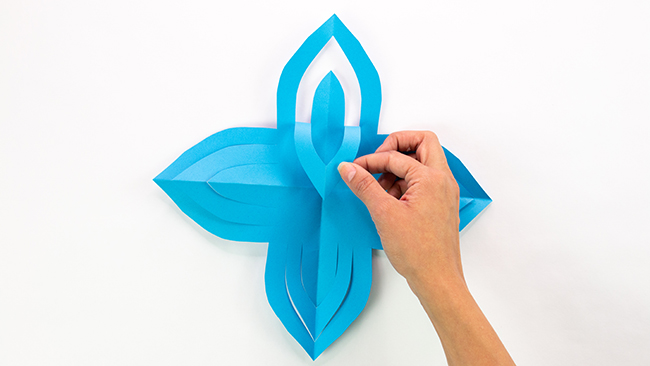
9. Take both snowflakes and glue the backs together.
10. Glue a piece of yarn to the edge to make it easy to hang.
Happy Crafts-mas!